Today i would like to show you how in a few quick steps create an NAS server using some old spare parts that i found in my place. It may be not an performance demon, however – I have already tested whole setup for a bunch of weeks, and it is usable as never was before.
Building that kind of construction does not need from You high-level of the IT knowledge, but it will require some basics there. Overall, TrueNas (former. FreeNas) is an freeBSD-based piece of software that allows You to easily set up home Network Attached Storage, home Cloud Service, and VPN based on OpenVPN service. It also let You install additional plugins like NextCloud suite, Plex MediaCenter server, Emby Media Center server, GitLab instance, Jenkins instance or even a MinecraftServer. All of those plugins are running in a Docker-a-like sandboxed containers containers. Las, but not least functionality of TrueNas is that it let You set up your own Virtual Machines using freeBSD’s Byhve paravirtualizer. Basically it’s a full sized server tool for home usage.
First things first – Requirements:
- An spare PC
- Im using some old parts there:
- i3 3240 (2C/4T) – Unfortunately, it has no IOMMU (VT-d) Support, so until firther upgrade, i’ll be not able to show You how to perform an PCI-e Passthru there
- 8 GiB of DDR3 Ram
- A legacy lenovo motherboard with 4 Sata’s & 1 PCI-e x16 and 2 PCI-e x2 slots for further upgrades.
- A bunch of HDD’s – Im currently using one 500GB WD Caviar, and a bunch of od 2.5″ Segate 320Gb’s
- Network cable
- Spare Keyboard and Mouse for the installation process
- An 2 usb thumb drives – 4GB should be enough, second one in case You would like to install TrueNas on it
- Rufus / Etchr to put an ISO on Usb Drive
Ok, let’s assume that You have all the required stuff, so we can begin, first of all – download an ISO from Truenas.Com
Backup all your data from the Usb drive, as they will be gone after next steps!
Open Rufus (or Etcher) select Your USB drive, change Boot selection to “Disk or ISO image” and press select to navigate to Your ISO file. It should look more/less like that:
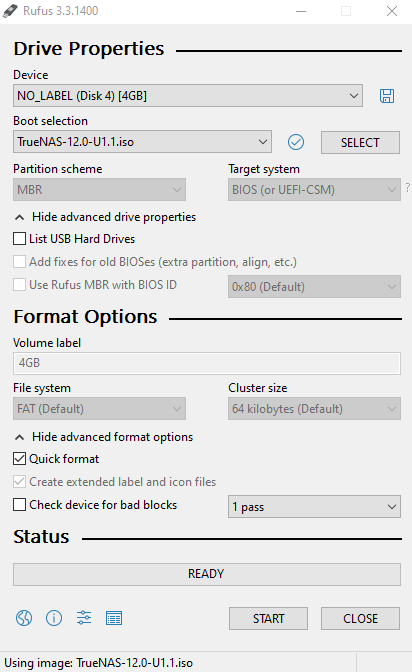
If it is – feel free to press start and wait couple of minutes to process get completed.
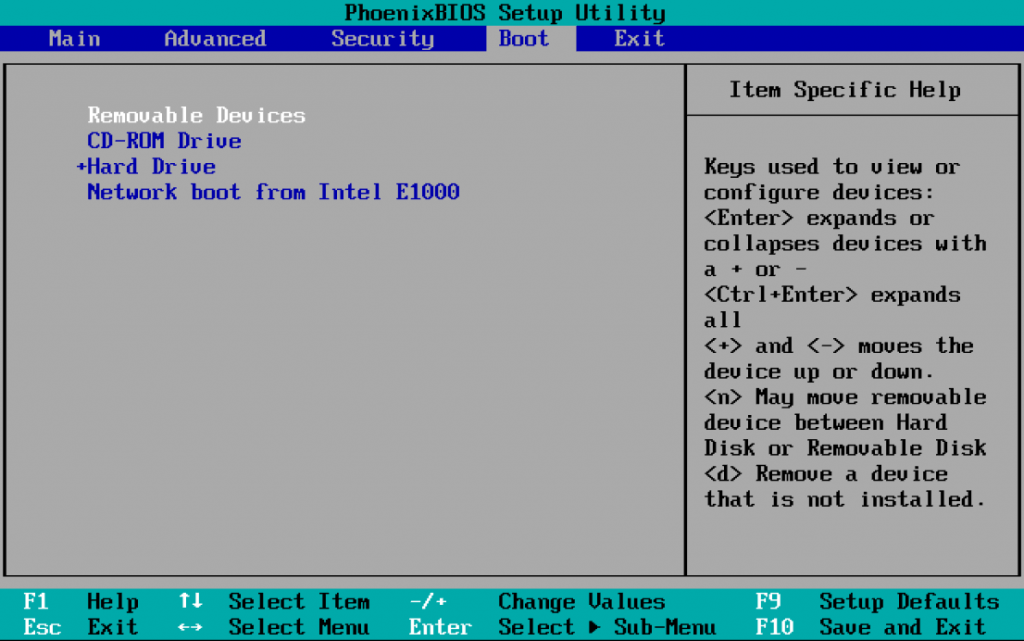
Meanwhile, as the drive is probably still burning – You can change some BIOS/UEFI Settings to let the PC know that you whish to boot from the USB
As i wrote earlier im using some legacy Mobo with BIOS. However, that board have some capabilities to boot via UEFI too. Also I can use an F12 button to choose one-time boot device. In case there is no option like that on Your board – that screenshot explains how to set up correct boot order:
Once again, to make sure – if you have any data on the drives that you are trying to perform that instalation – make sure that You have all backed up!
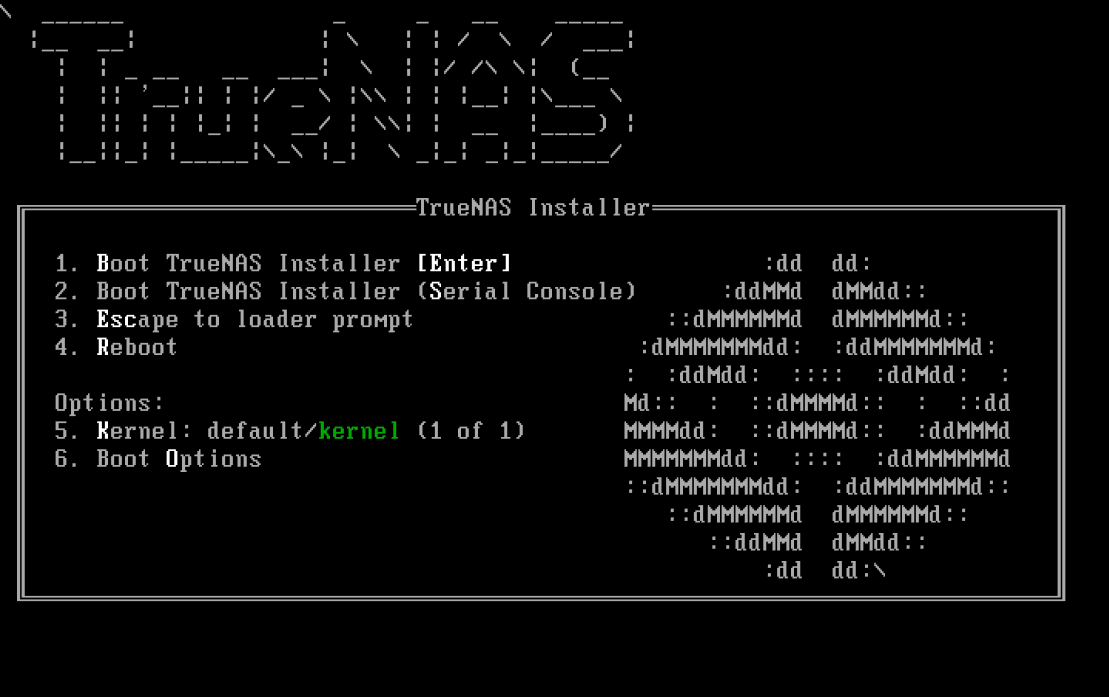
All right. We have ThumbDrive ready, We have Pc configured to Boot that boy up, let’s give it a try then. If everything has been correctly configured You should have something like that:

Choose option 1 to proceed the installation, and a bunch of log will appear there followed by:
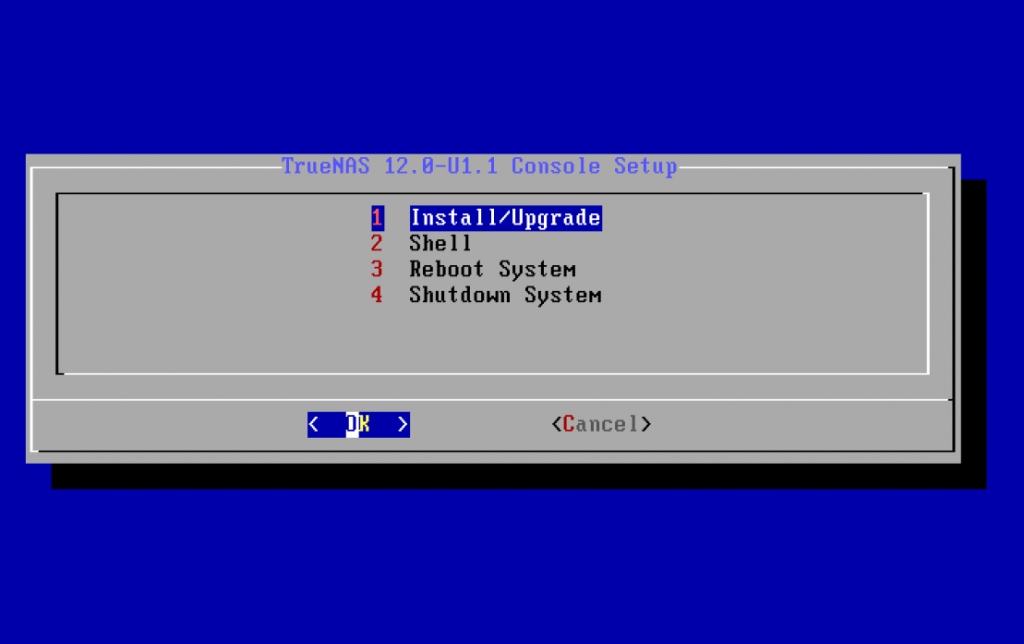
Where You should select 1 once again.
As I’m a quite lazy guy, im using an VMWare to shouw You the process, however over there, You should find some of the drives:
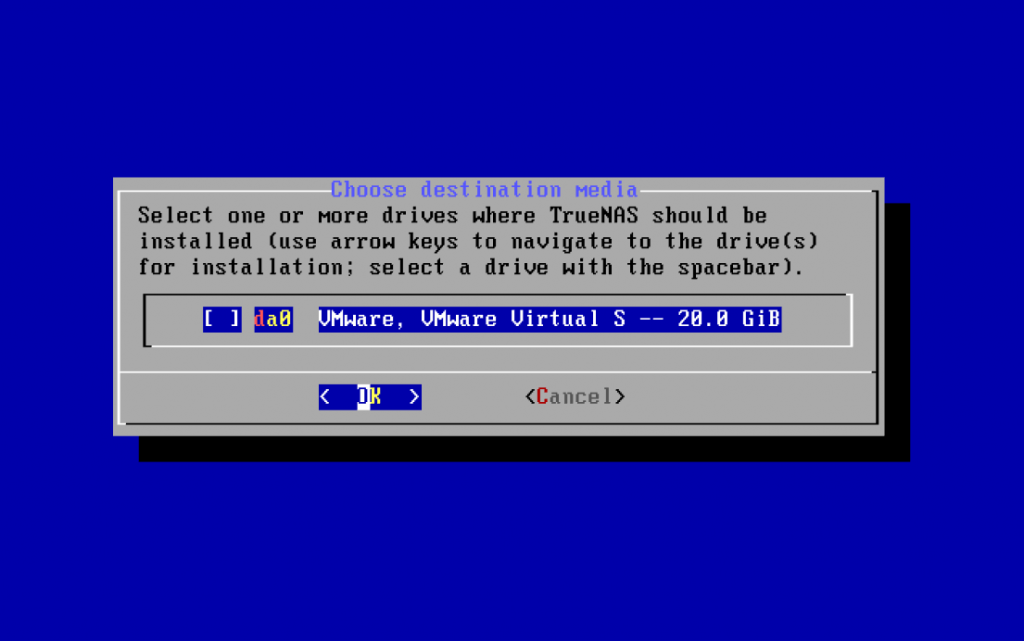
Select the one that You whish to use as an Boot drive for TrueNas. It’s quite preffered by the System to boot from Usb drive – so if You are preffering to install TrueNas on usb drive – that is the momment to choose that.
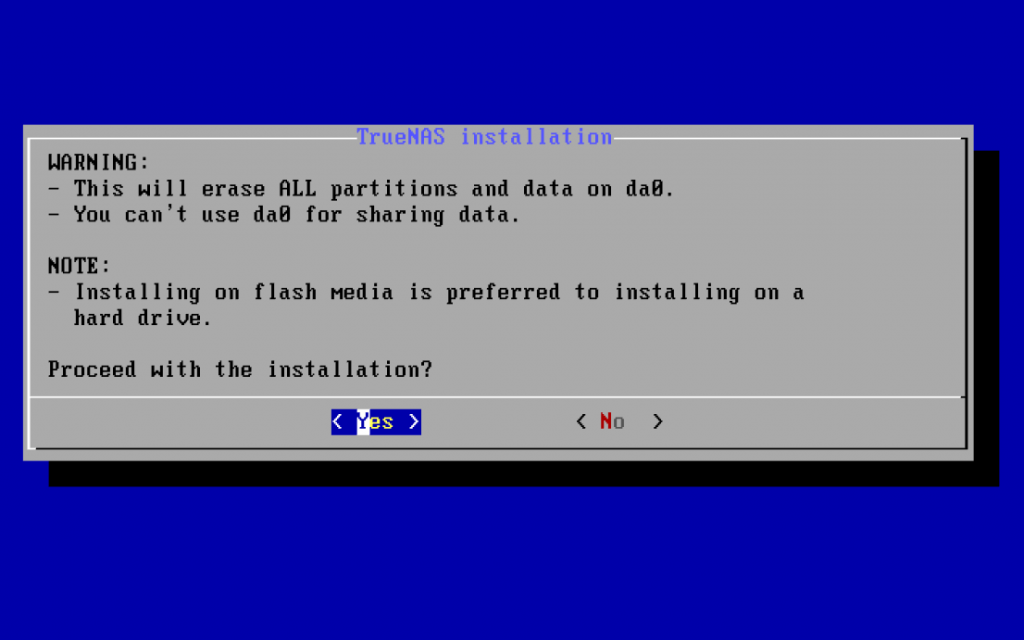
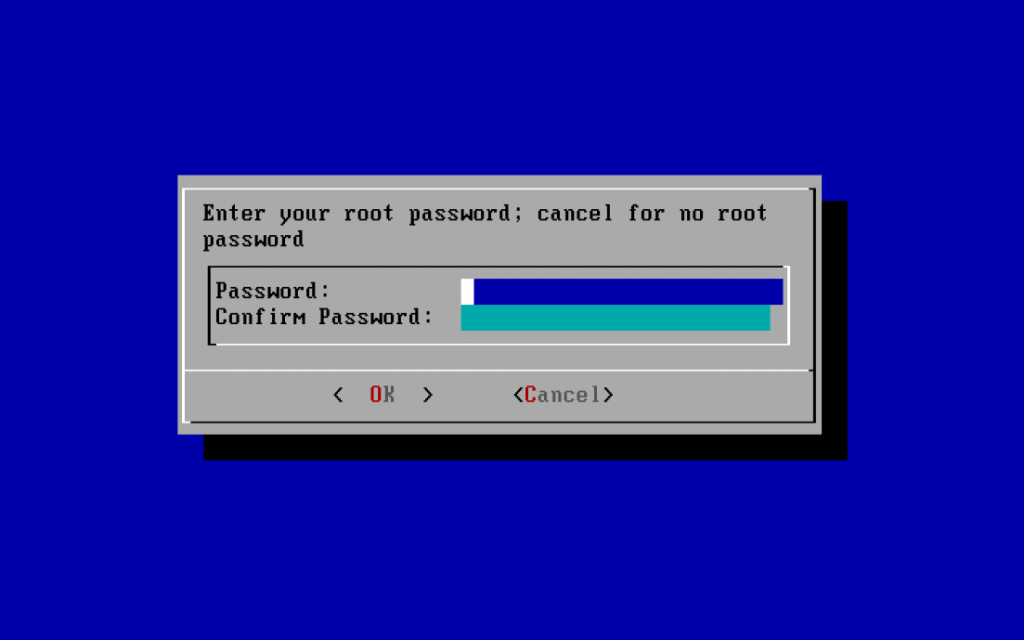
If you are sure, what You are doing (and have BACKUPS!), press Yes, put some root password…
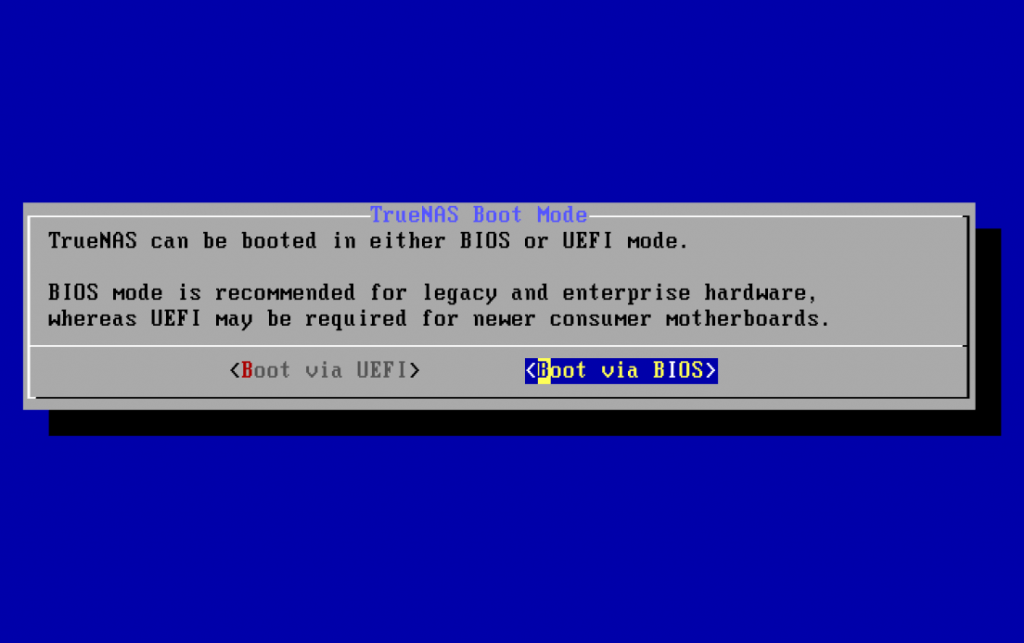
… boot type …
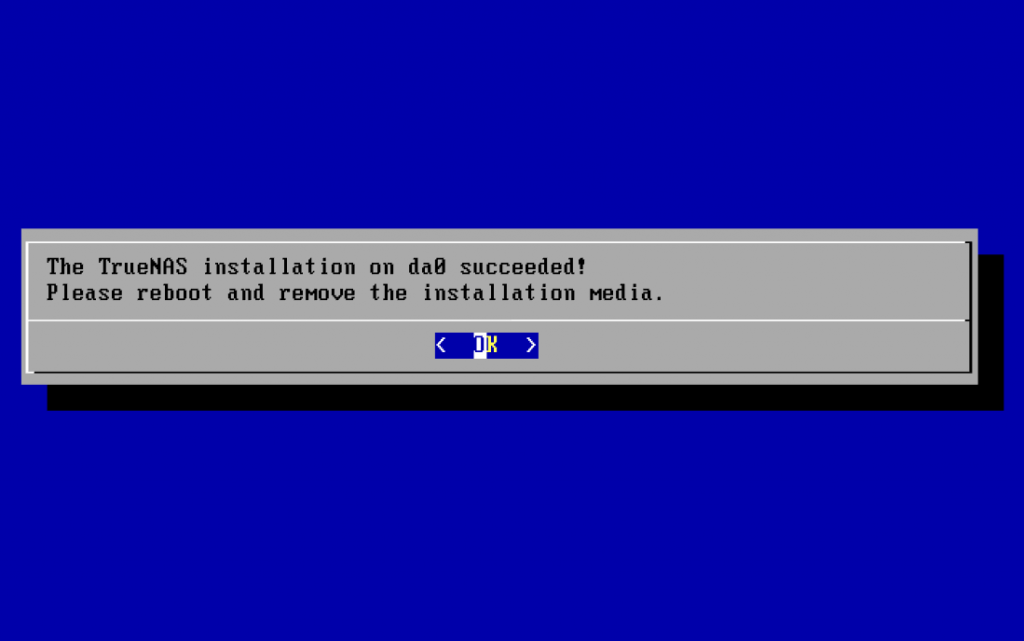
… and now installation begins on the chosen drive.

Now, when the installation is completed, remove USB stick from PC and press Enter to restart:
After reboot it should greet You with an TrueNas boot menu,
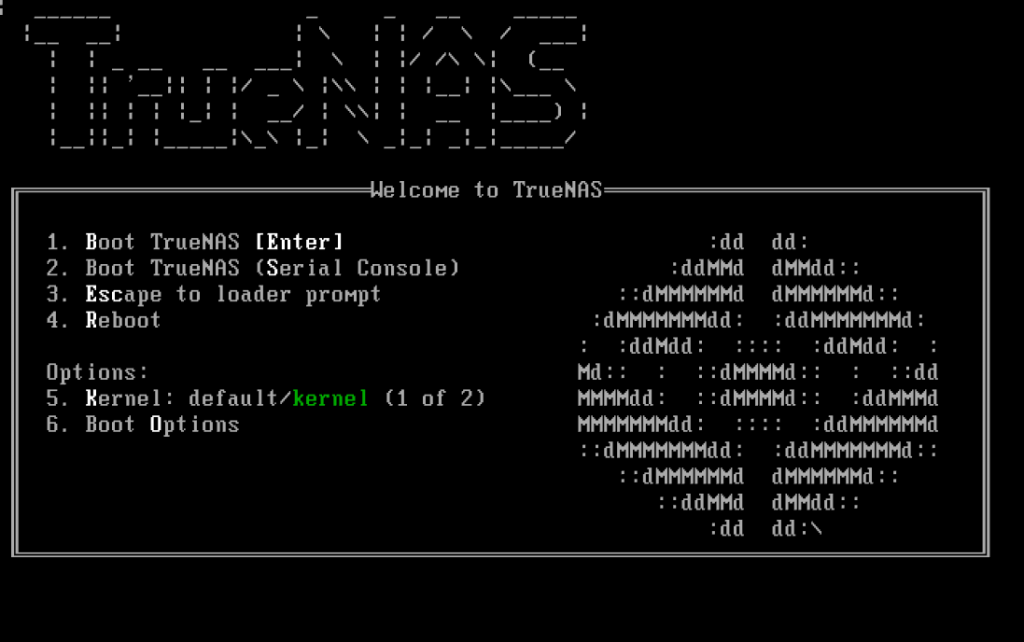
as usual select option 1 and let the system load, first boot may take a couple of minutes to complete. After everything is set up, You should see a following screen:
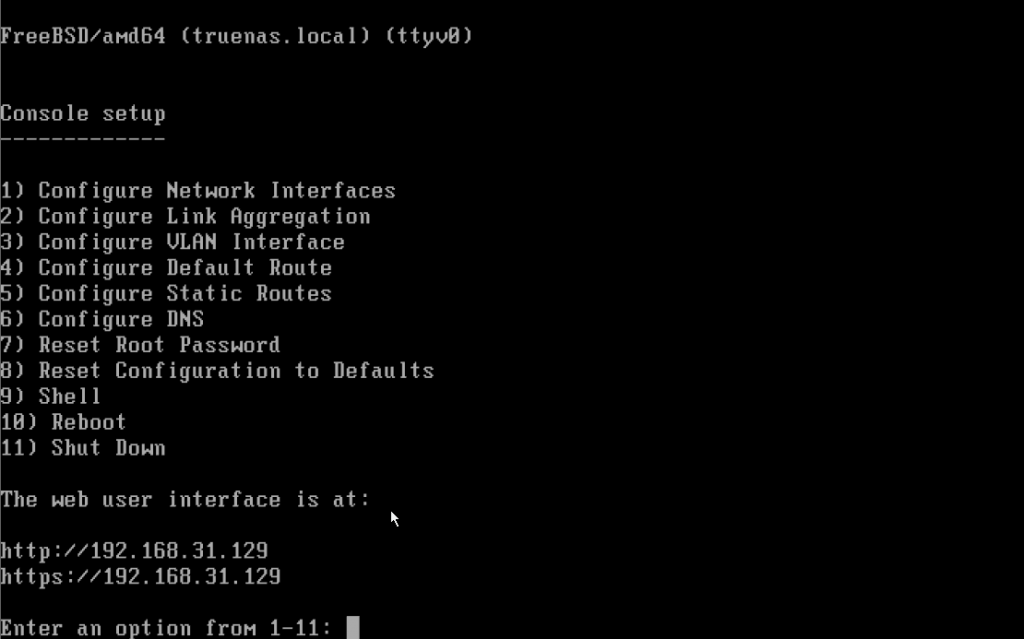
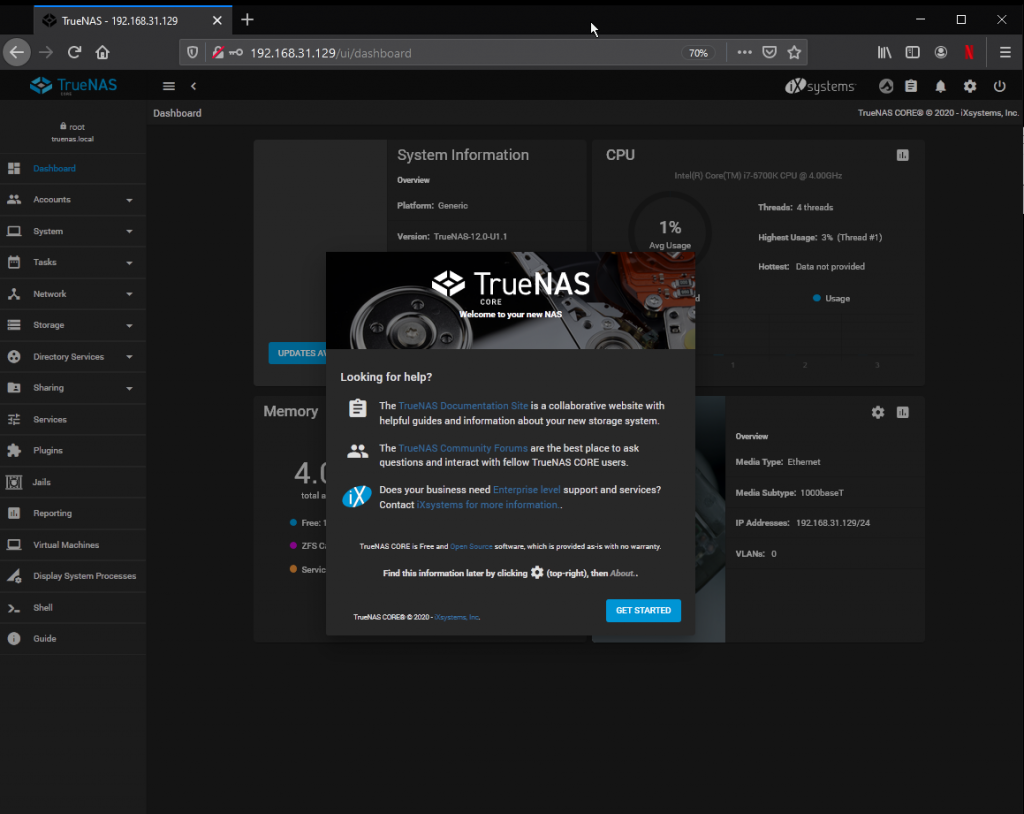
It means that the system is up and running, and accessing it via Web UI (use any other machine, or Mobile) should give you an TrueNas logon screen like that:
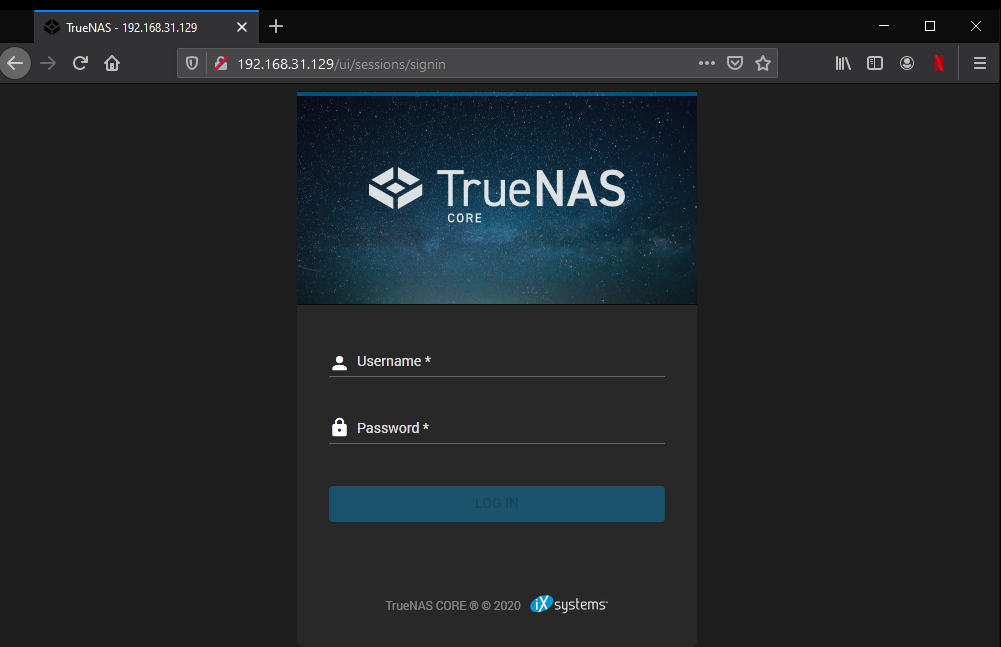
First logon should can be performed with root credentials, that You have set during the installation process. In case that you put an random one, and cannot remind what the ehck it was – go back to the console, select option 7 and reset the password.